- Quickstarts
- Rails w/ Sidekiq
Deploy Rails with Sidekiq on Render
In this guide, we will show you how to configure your existing Rails and Sidekiq application on Render.
While processing web requests, you may have to offload tasks to an asynchronous, background process (typically called a worker). Sidekiq is a popular task processing framework for Ruby. Render makes it easy to use Sidekiq with Rails.
At the end, you’ll have 3 services:
- Rails Web Service to handle web requests
- Sidekiq Background Worker to process tasks
- Render Key Value instance for the persistence and communication of Sidekiq tasks
Deploy to Render
There are 2 ways to deploy. We will first walk through manually setting up your services using the dashboard. We will then walk through declaring your services within your repository with Blueprints.
Deploy Manually
Render Key Value
Create a new Render Key Value instance with the following settings using the Key Value deployment guide.
| Maxmemory Policy | noeviction (recommended for queues/persistence) |
| Plan | Starter |
We choose the noeviction maxmemory policy to ensure the Key Value instance does not delete tasks when its memory is full. Instead, it will prevent the creation of new tasks.
We choose the Starter instance type as it is the smallest instance type with persistence. This means that the tasks will be written out to disk and will be retained even if the Key Value instance restarts.
Copy the Internal URL, which looks like redis://red-xxxxxxxxxxxxxxxxxxxx:6379
Rails Web Service
Create a new Web Service for your Rails application. You may need to adjust the Build Command and Start Command for your service.
If you already have a Rails app deployed and are just adding Sidekiq, you can configure the REDIS_URL environment variable and skip the rest of this step.
| Language | Ruby |
| Build Command | bundle install; bundle exec rake assets:precompile; bundle exec rake assets:clean; |
| Start Command | bundle exec puma -t 5:5 -p ${PORT:-3000} -e ${RACK_ENV:-development} |
Add the following environment variables to your web service (along with any other environment variables you need):
| Key | Value |
|---|---|
REDIS_URL | <Internal URL>, the internal Key Value URL from step 1. |
RAILS_MASTER_KEY | Your Rails application’s RAILS_MASTER_KEY |
Sidekiq Background Worker
Create a new Background Worker to process Sidekiq tasks.
| Language | Ruby |
| Build Command | bundle install |
| Start Command | bundle exec sidekiq |
Add the following environment variables to your background worker (along with any other environment variables you need):
| Key | Value |
|---|---|
REDIS_URL | <Internal URL>, the internal Key Value URL from step 1. |
RAILS_MASTER_KEY | Your Rails application’s RAILS_MASTER_KEY |
If your Sidekiq worker needs access to a shared database or other service, environment groups are useful for sharing environment variables across services on Render.
Test it out!
Wait for these three services to finish deploying and then visit your Rails .onrender.com URL and trigger some tasks.
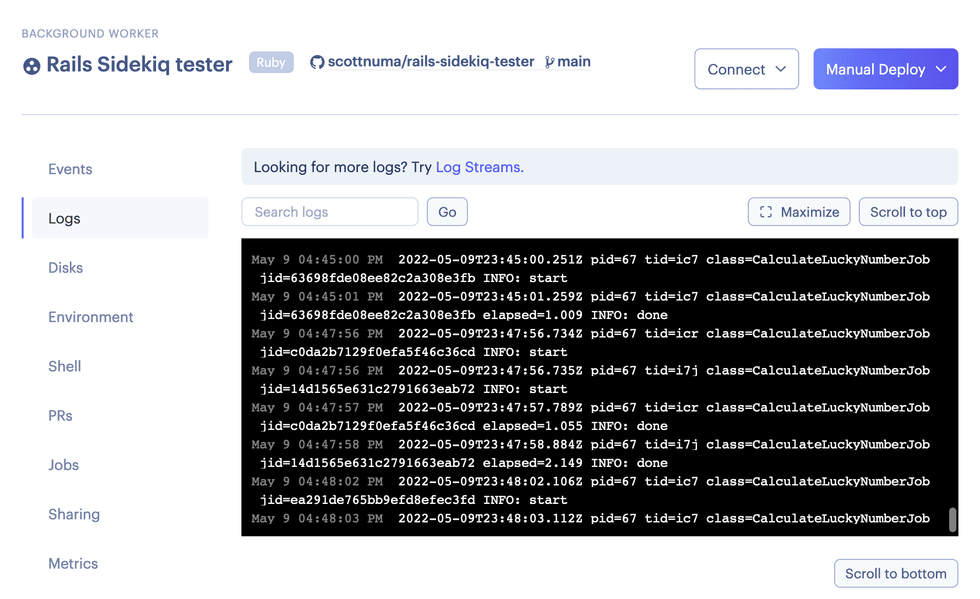
You should be able to see the Sidekiq Background Worker processing tasks in its logs.

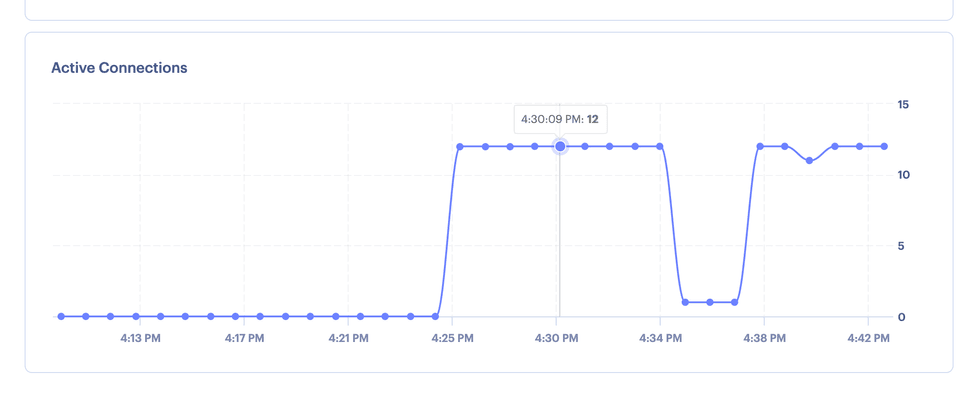
On the Redis metrics page, you should be able to see Active Connections in use.

Blueprints
Render enables users to deploy their services as code in a render.yaml file with Blueprints.
The following is an example render.yaml to configure and deploy all 3 services.
services:
  - type: keyvalue
    name: sidekiq-keyvalue
    region: ohio
    maxmemoryPolicy: noeviction
    ipAllowList: [] # only allow internal connections

  - type: worker
    name: sidekiq-worker
    runtime: ruby
    region: ohio
    buildCommand: bundle install
    startCommand: bundle exec sidekiq
    envVars:
      - key: REDIS_URL
        fromService:
          type: keyvalue
          name: sidekiq-keyvalue
          property: connectionString
      - key: RAILS_MASTER_KEY
        sync: false
  - type: web
    name: rails-web
    runtime: ruby
    region: ohio
    buildCommand: bundle install; bundle exec rake assets:precompile; bundle exec rake assets:clean;
    startCommand: bundle exec puma -t 5:5 -p ${PORT:-3000} -e ${RACK_ENV:-development}
    envVars:
      - key: REDIS_URL
        fromService:
          type: keyvalue
          name: sidekiq-keyvalue
          property: connectionString
      - key: RAILS_MASTER_KEY
sync: false-
Copy the above code into
render.yamlin the top level of your repository. -
Modify the
render.yamlto suit your application. Remember, if you change a service name you need to update the corresponding reference in the.envVarsthat access variables from the service with the new name. -
Change the region fields to your chosen region.
-
Commit and push your changes.
-
On the Render Dashboard, go to the Blueprint page and click the
New Blueprint Instancebutton. Select your repository (after giving Render the permission to access it, if you haven’t already). -
Enter your Rails application’s RAILS_MASTER_KEY for the background worker and web service.
-
In the deploy window, click
Approve. -
Test it out with the steps in the previous section.